Unity
Multiplayer FPS is a first-person shooter built with Unity 6 and Netcode for Entities (DOTS) that demonstrates dedicated server hosting on GameFlow using a direct connection (IP and port).
This sample builds on Unity's official Multiplayer FPS template, adapted here to show GameFlow hosting. All Unity trademarks, assets, and template code belong to Unity Technologies. This guide only covers the GameFlow integration layer on top.
Prerequisites
- Access to the Multiplayer FPS repository (Early Adopter access required, contact GameFlow support)
- A GameFlow account
- Unity 6 (6000.x) with the Linux Dedicated Server build support module
Step 1: Clone the Repository
git clone https://github.com/GameFlowGG/gameflow-unity-multiplayer-example
cd gameflow-unity-multiplayer-example
Step 2: Open the Project
- Open Unity Hub
- Click Add → Add project from disk
- Select the cloned
gameflow-unity-multiplayer-exampledirectory - Open it with Unity 6 (6000.x); let the Package Manager resolve packages on first import
Step 3: Install the GameFlow SDK
GameFlow provides a native Unity Game Server SDK that handles server lifecycle, automatic health reporting, and player tracking. Off GameFlow (running locally), the SDK switches to local mode automatically, so the same build runs everywhere with no extra configuration.
-
Open Window → Package Manager → + → Add package from git URL
-
Paste:
https://github.com/GameFlowGG/gameflow-gameserver-sdk.git?path=/sdk/unity/Packages/gg.gameflow.gameserver#sdk/unity/v0.1.0
Requires Unity 2022.3+ with API Compatibility Level .NET Standard 2.1 (the Unity default).
Step 4: GameFlow SDK Integration
The dedicated server creates one GameFlowClient for the server process and drives the lifecycle from it. The bootstrap lives in Assets/Scripts/DedicatedServer/ServerBootstrap.cs and is guarded by #if UNITY_SERVER, so it only compiles into dedicated-server builds.
Initialization
Create the client and connect. GameFlowRunner pumps SDK callbacks onto Unity's main thread and sends a clean shutdown when the process quits:
var runner = GameFlowRunner.Create();
m_GameFlow = new GameFlowClient(new GameFlowOptions
{
    Logger = new UnityDebugLogger(),
    Dispatcher = runner.Dispatcher,
});
runner.Bind(m_GameFlow);

await m_GameFlow.Start();          // sidecar on GameFlow, local mode off it
GameFlowServerHost.Bind(m_GameFlow);
Player Tracking
With Netcode for Entities, peers connect and disconnect inside an ECS system, not a MonoBehaviour. A small static bridge lets the Burst-compiled server system report players. This keeps the server alive (GameFlow reaps servers reporting zero players past the idle timeout) and powers the live counts in the dashboard:
// GameFlowServerHost.cs, bridge between the ECS/Burst layer and the async SDK
public static class GameFlowServerHost
{
    static GameFlowClient s_GameFlow;
    public static void Bind(GameFlowClient gf) => s_GameFlow = gf;
    public static void Clear() => s_GameFlow = null;

    public static async void PlayerConnected(int networkId) {
        if (s_GameFlow == null) return;
        await s_GameFlow.Players.Connect(networkId.ToString());
    }
    public static async void PlayerDisconnected(int networkId) {
        if (s_GameFlow != null) await s_GameFlow.Players.Disconnect(networkId.ToString());
    }
}
Then forward Netcode's connection events from ServerGameSystem, where they are already read from NetworkStreamDriver.ConnectionEventsForTick. Wrap the calls in [BurstDiscard] helpers so the Burst-compiled struct stays valid:
foreach (var evt in connectionEventsForTick)
{
    if (evt.State == ConnectionState.State.Connected)
        NotifyGameFlowPlayerConnected(evt.Id.Value);      // [BurstDiscard] -> GameFlowServerHost.PlayerConnected
    if (evt.State == ConnectionState.State.Disconnected)
        NotifyGameFlowPlayerDisconnected(evt.Id.Value);   // [BurstDiscard] -> GameFlowServerHost.PlayerDisconnected
}
The player list capacity comes from the Max Players per Server value you set on the game in GameFlow, so the server doesn't set it. The Netcode NetworkId is used as the session id. See Player Tracking for details.
Server Start
Bind the Netcode-for-Entities transport on a fixed port, then signal readiness. Health reporting starts automatically, there's no manual health loop to maintain:
const ushort ServerPort = 7979;

var gameConnection = GameConnection.GetServerConnectionSettings(ServerPort);
GameManager.SetGameConnection(gameConnection);

// server world -> NetworkStreamDriver singleton
GhostBridgeManager.Instance.SetServerNetworkStreamDriver(serverDriver);
serverDriver.Listen(gameConnection.ListenEndpoint);

await m_GameFlow.Ready();
Step 5: Build the Dedicated Server
The dedicated server must boot ServerScene (the scene holding ServerBootstrap).
- Open File → Build Profiles
- Create (or duplicate) a Dedicated Server → Linux profile
- In that profile, override the scene list so
ServerSceneis first - Build (IL2CPP) into the
Build/folder
If the server logs NullReferenceException from GhostSpawner / ManagerGhostsSpawner, the build booted a client scene instead of ServerScene, fix the profile's scene list.
Step 6: Package for Upload
Unity Linux servers ship as a container image. The repo includes Build/Dockerfile, which installs the runtime libraries the Unity 6 player and Unity App UI need. GameFlow builds and runs the image for you, no local Docker step required.
Create a .zip of the Build/ folder (including the Dockerfile) for upload.
Step 7: Create a Game on GameFlow
- Log in to your GameFlow account
- Navigate to the Games section → Create New Game
- Set Name to
Multiplayer FPS - Set Game Engine / Framework to
Unity
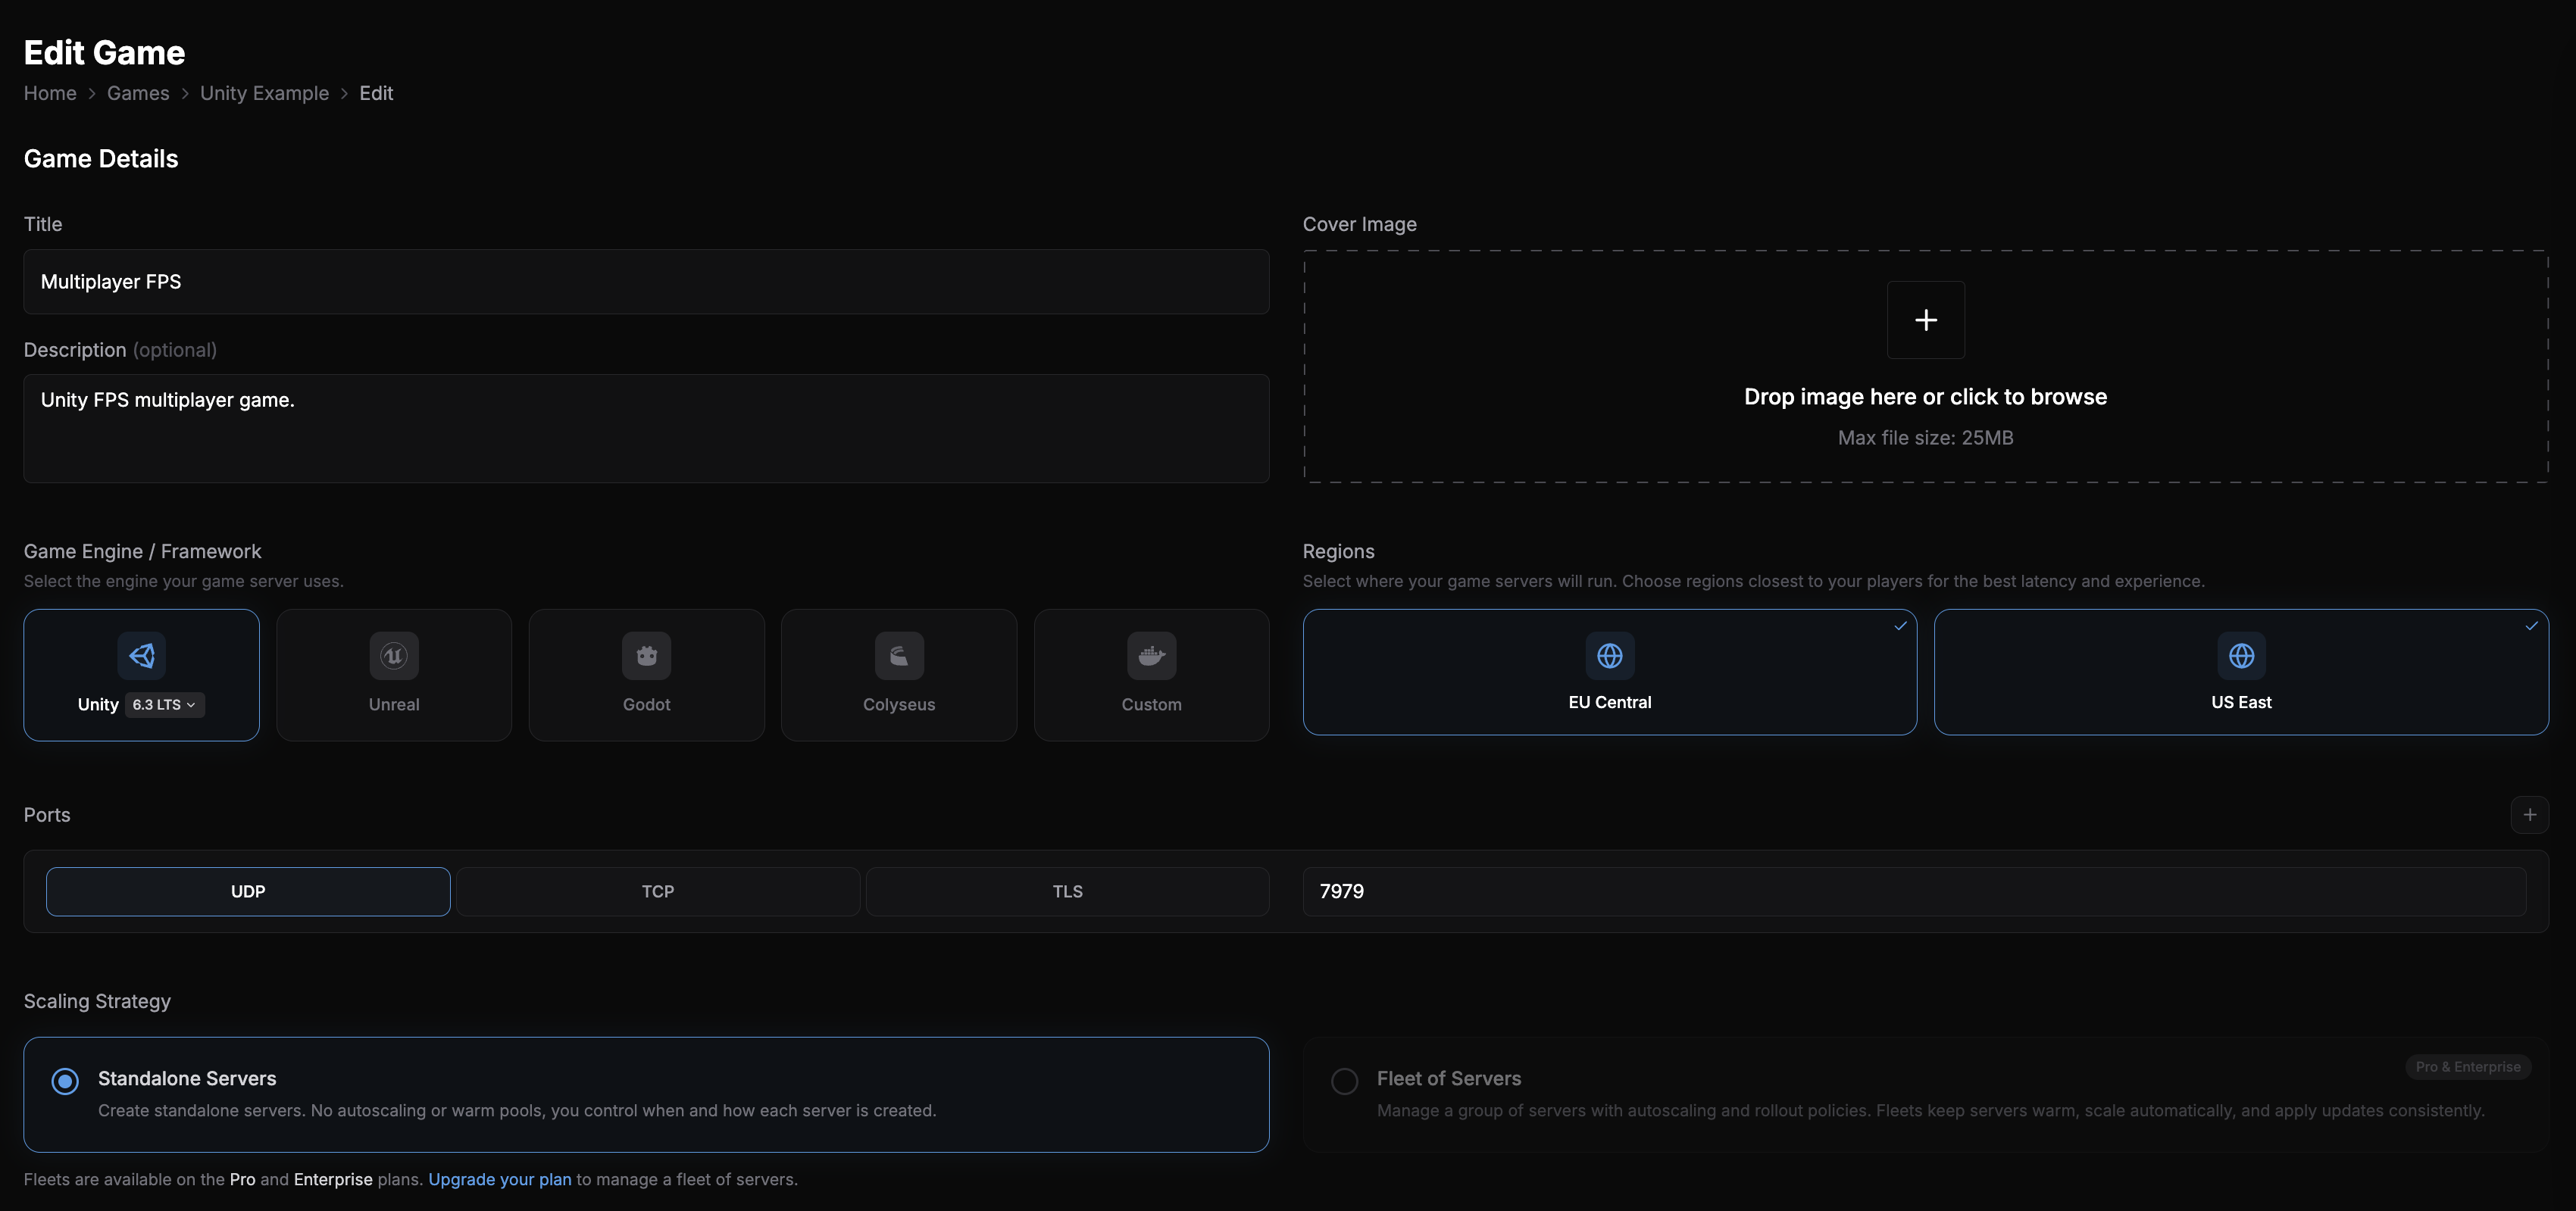
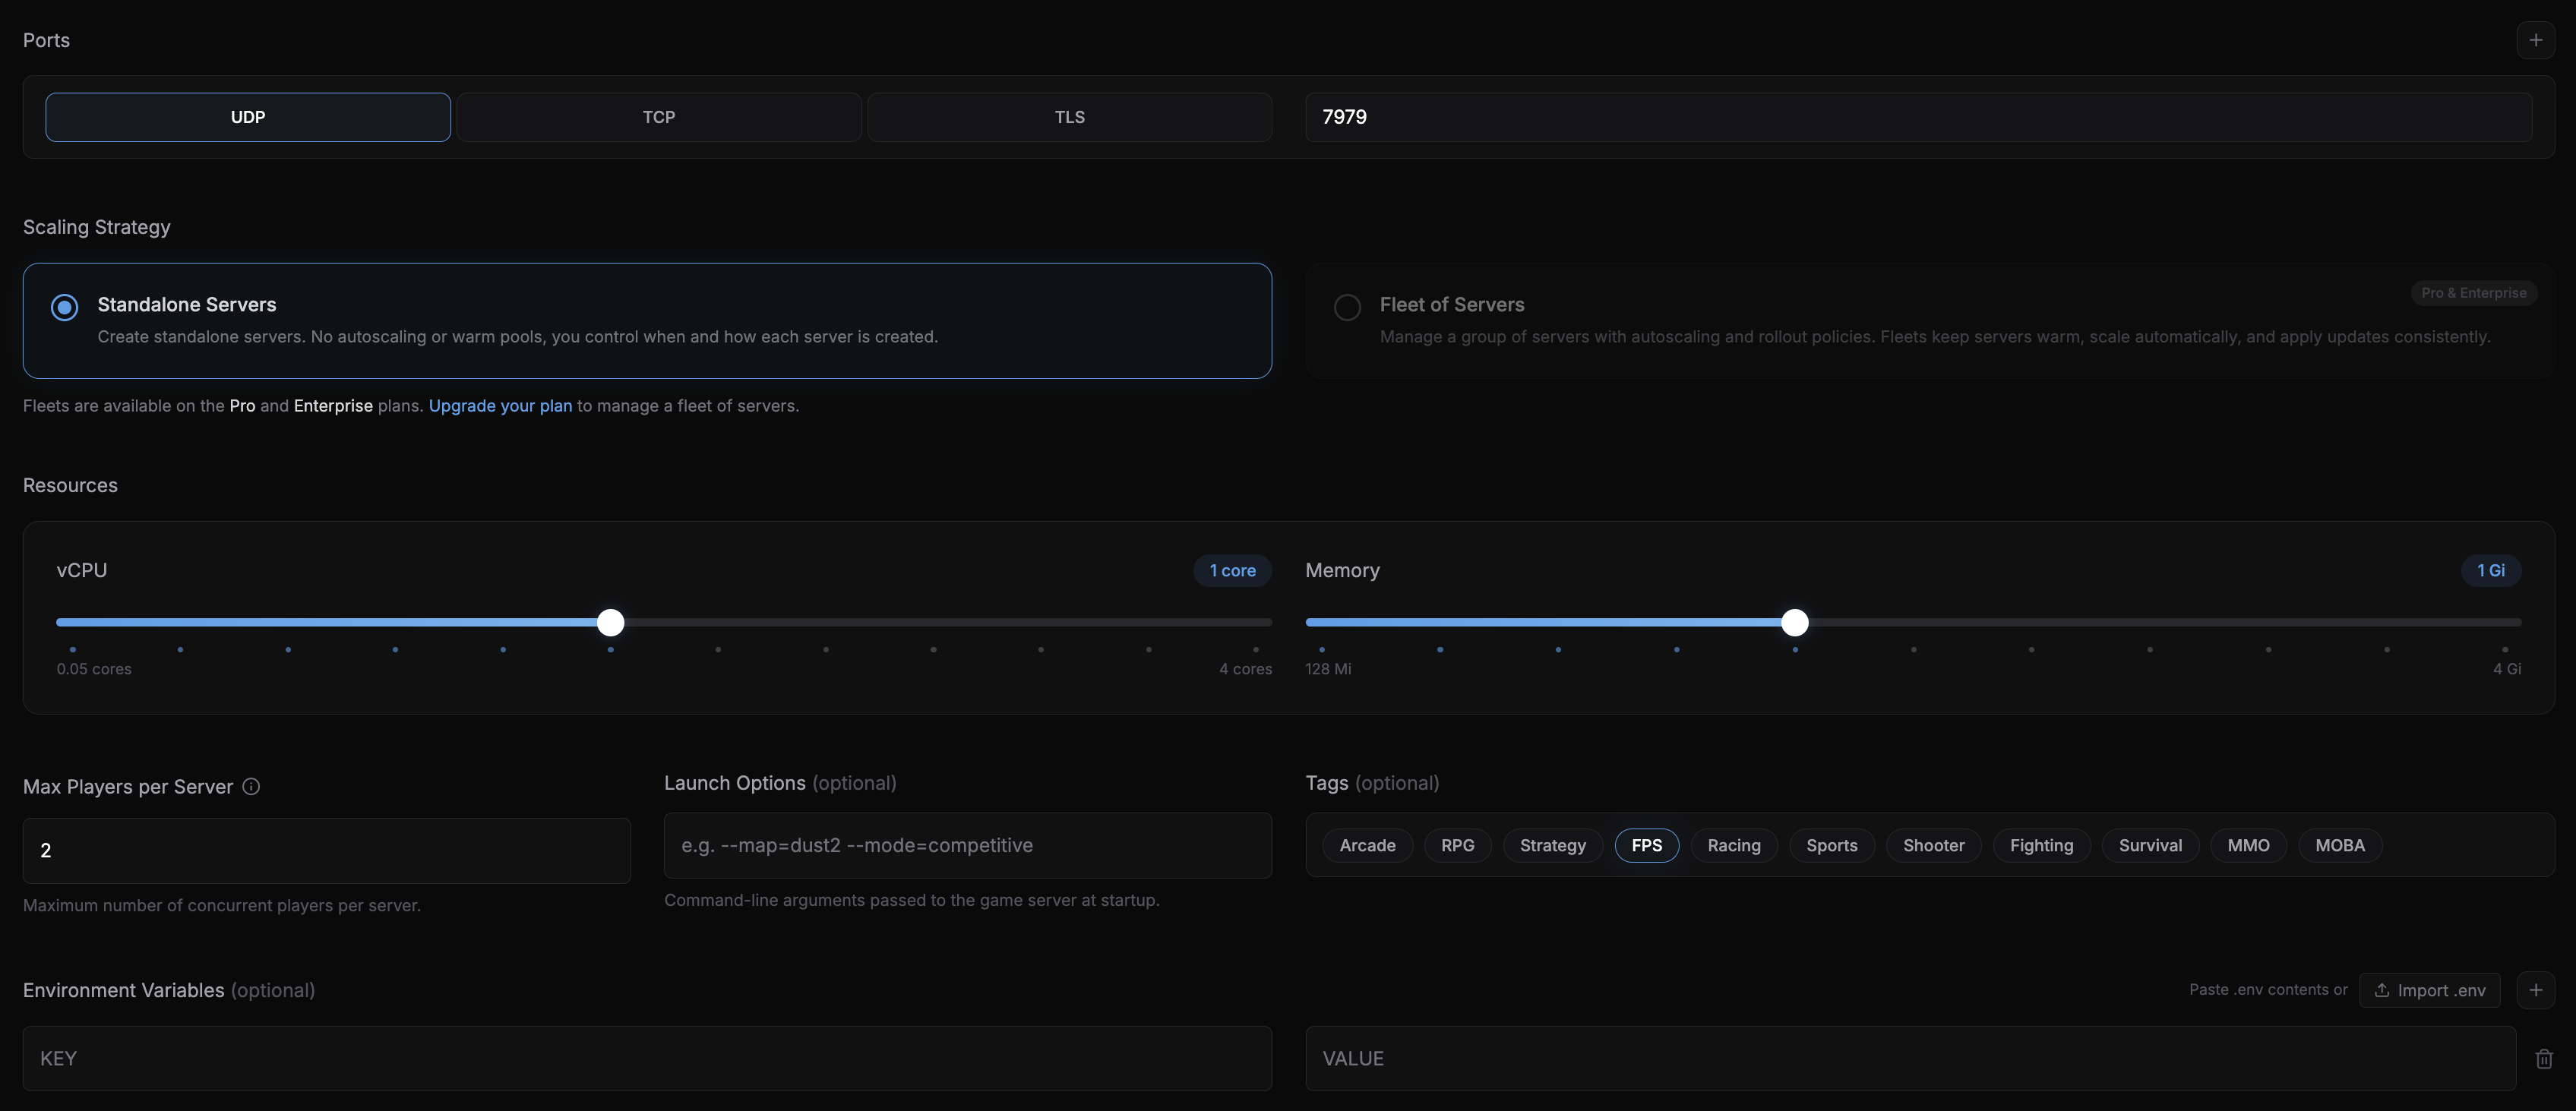
Step 8: Configure Server Settings
- Set Memory to
1GB - Set vCPU to
1 core - Set the Port to
7979(must matchServerPortand the DockerfileEXPOSE) - Set Max Players per Server (drives player-tracking capacity)
- Enable the regions you want to test
Step 9: Deploy and Test
- Upload the
.zipfile in the builds section - Click Create Test Server, wait for the server to reach "Ready"
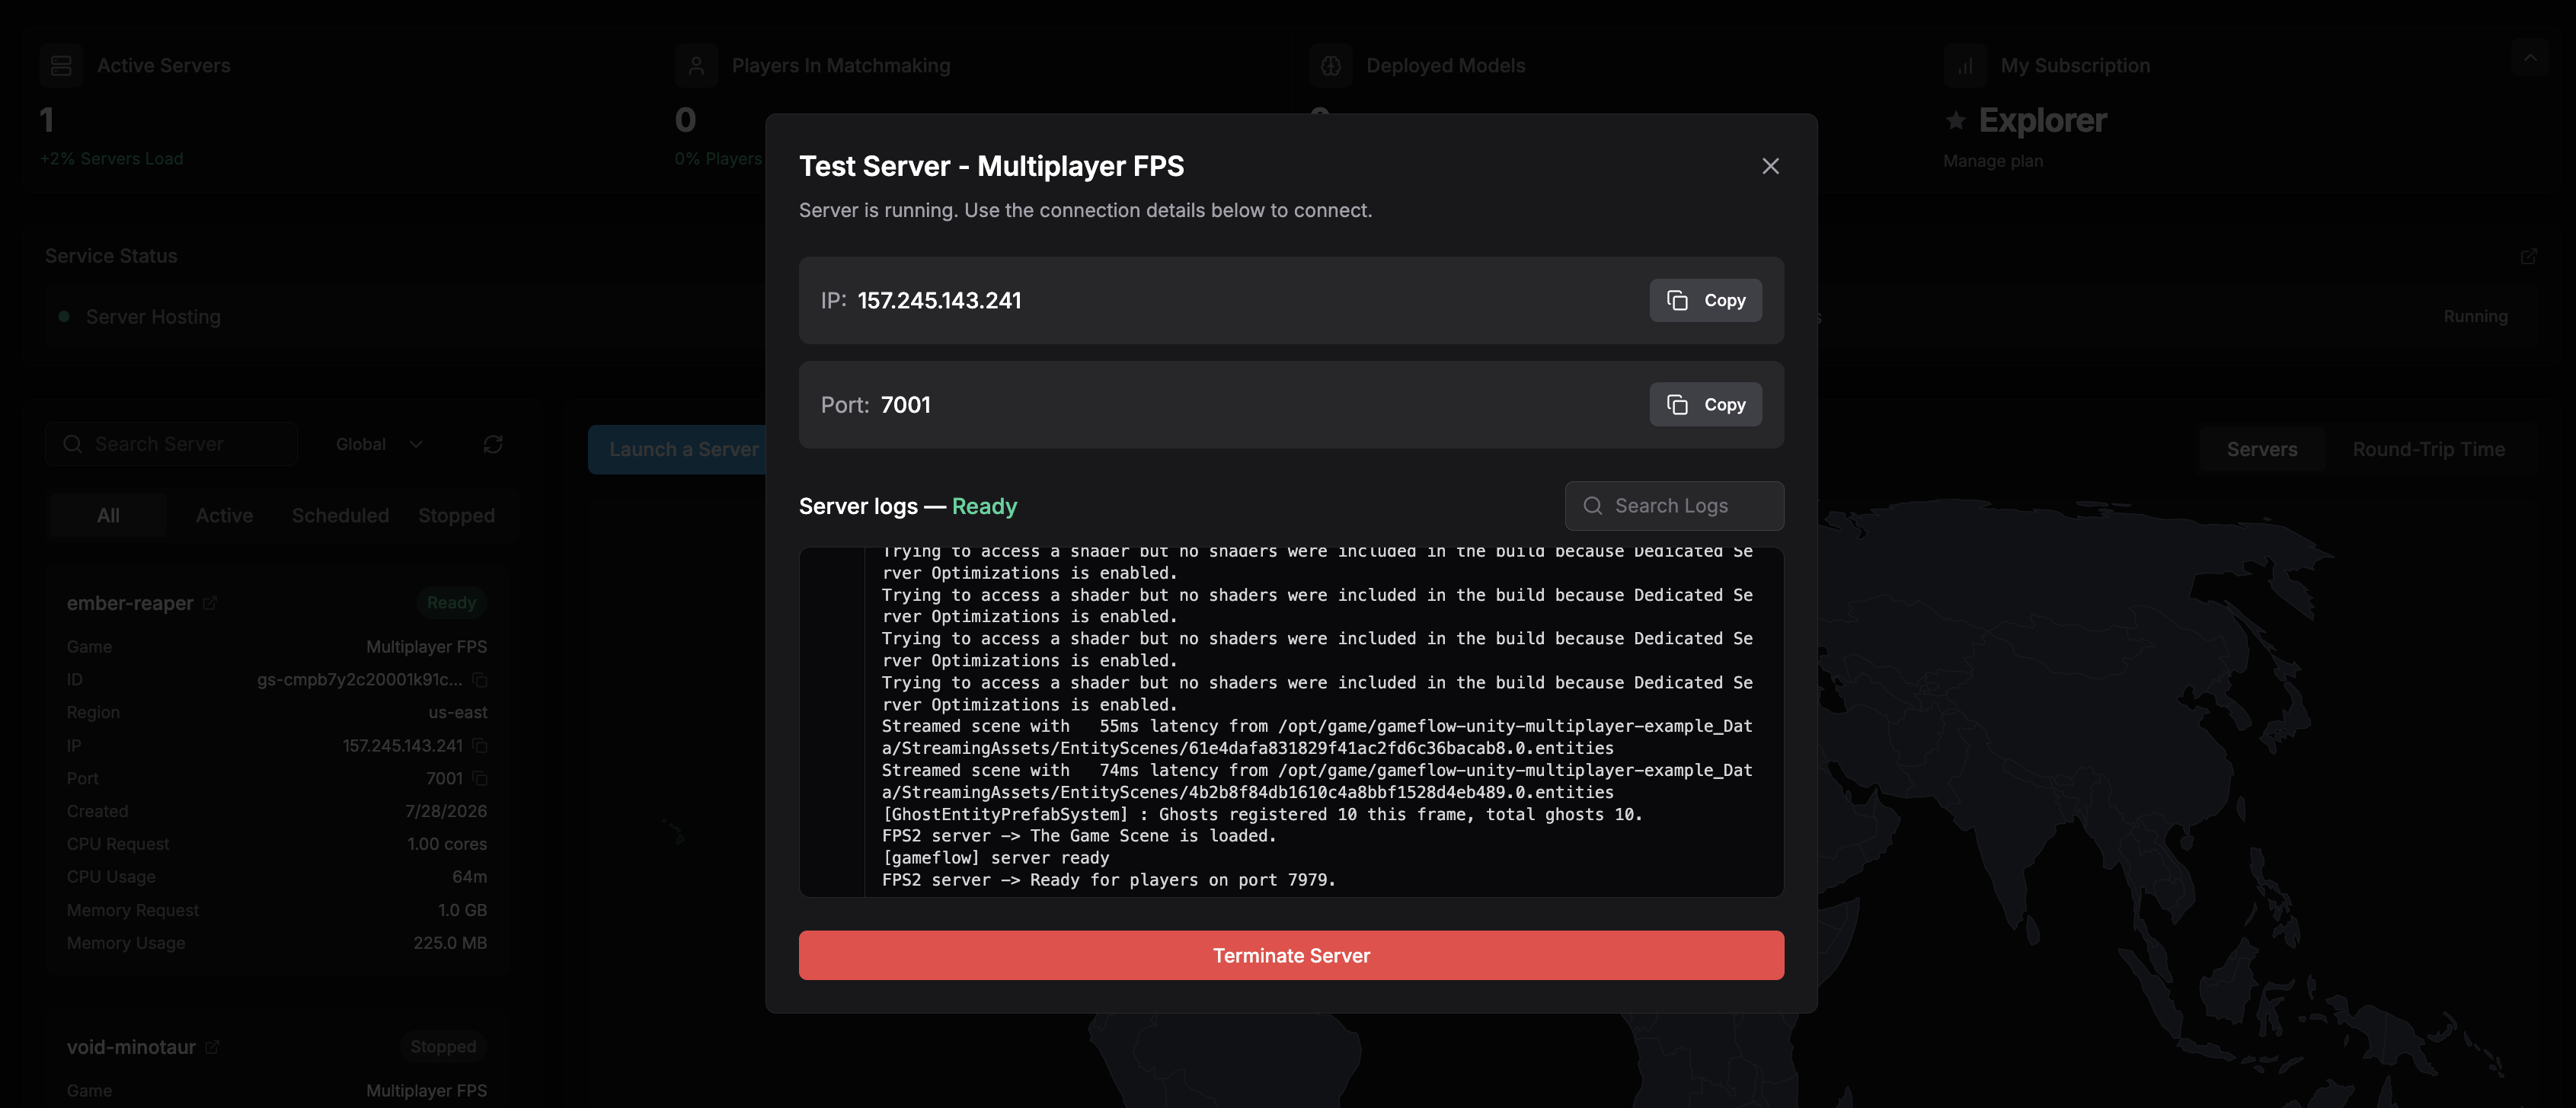
- Run the game locally in Unity, from the main menu enter the server IP and port
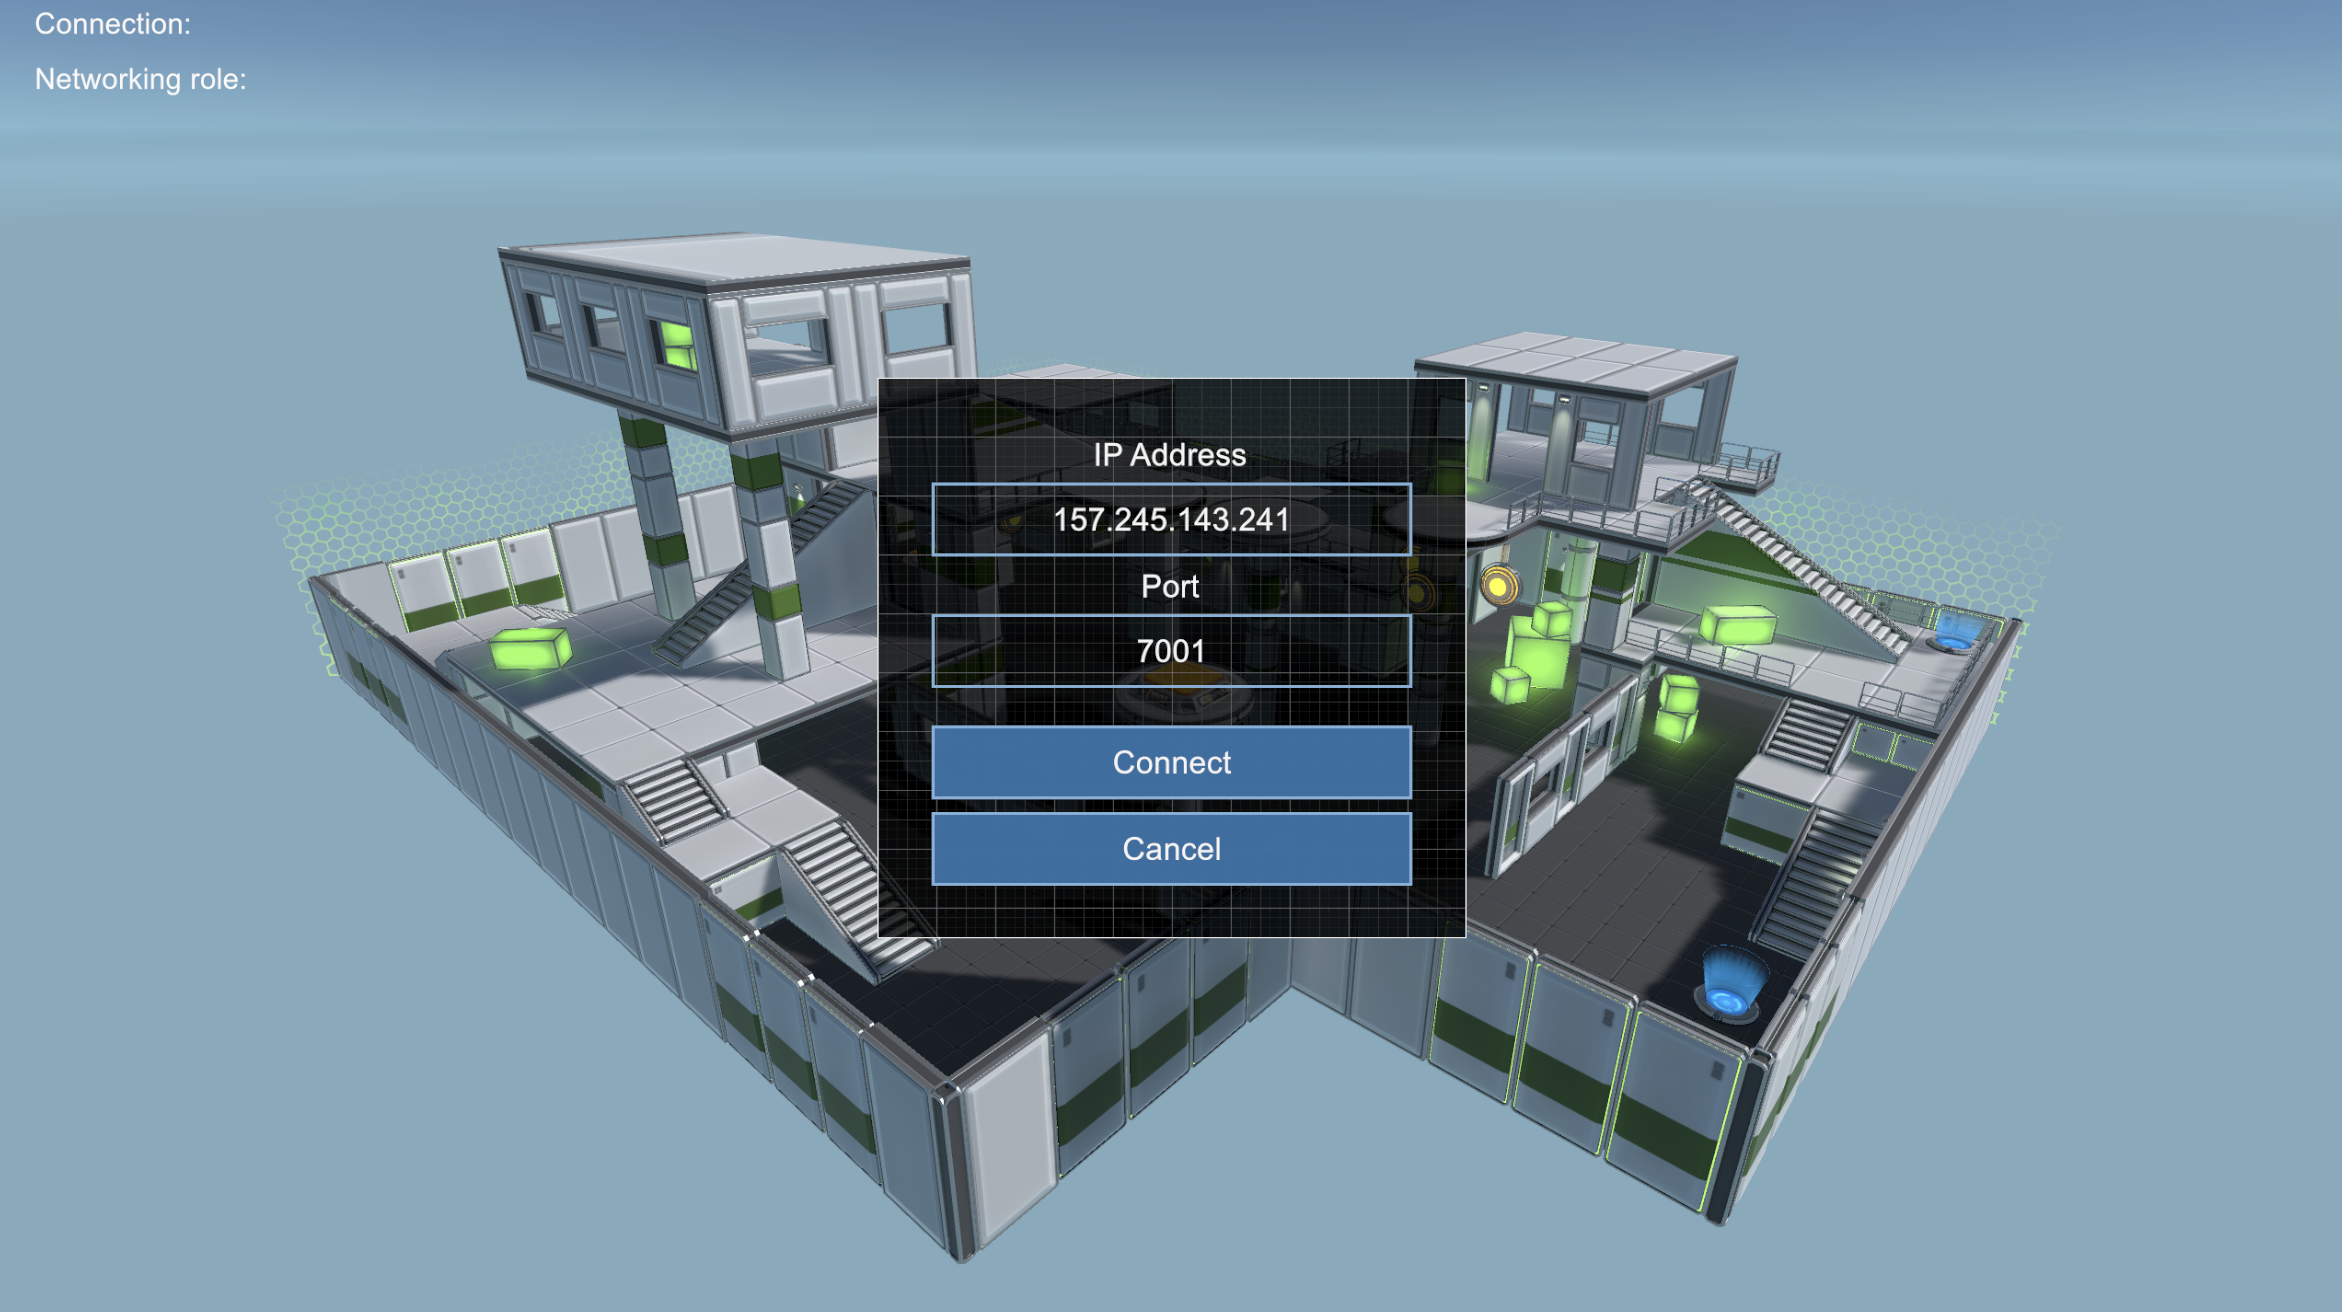
- Click Join
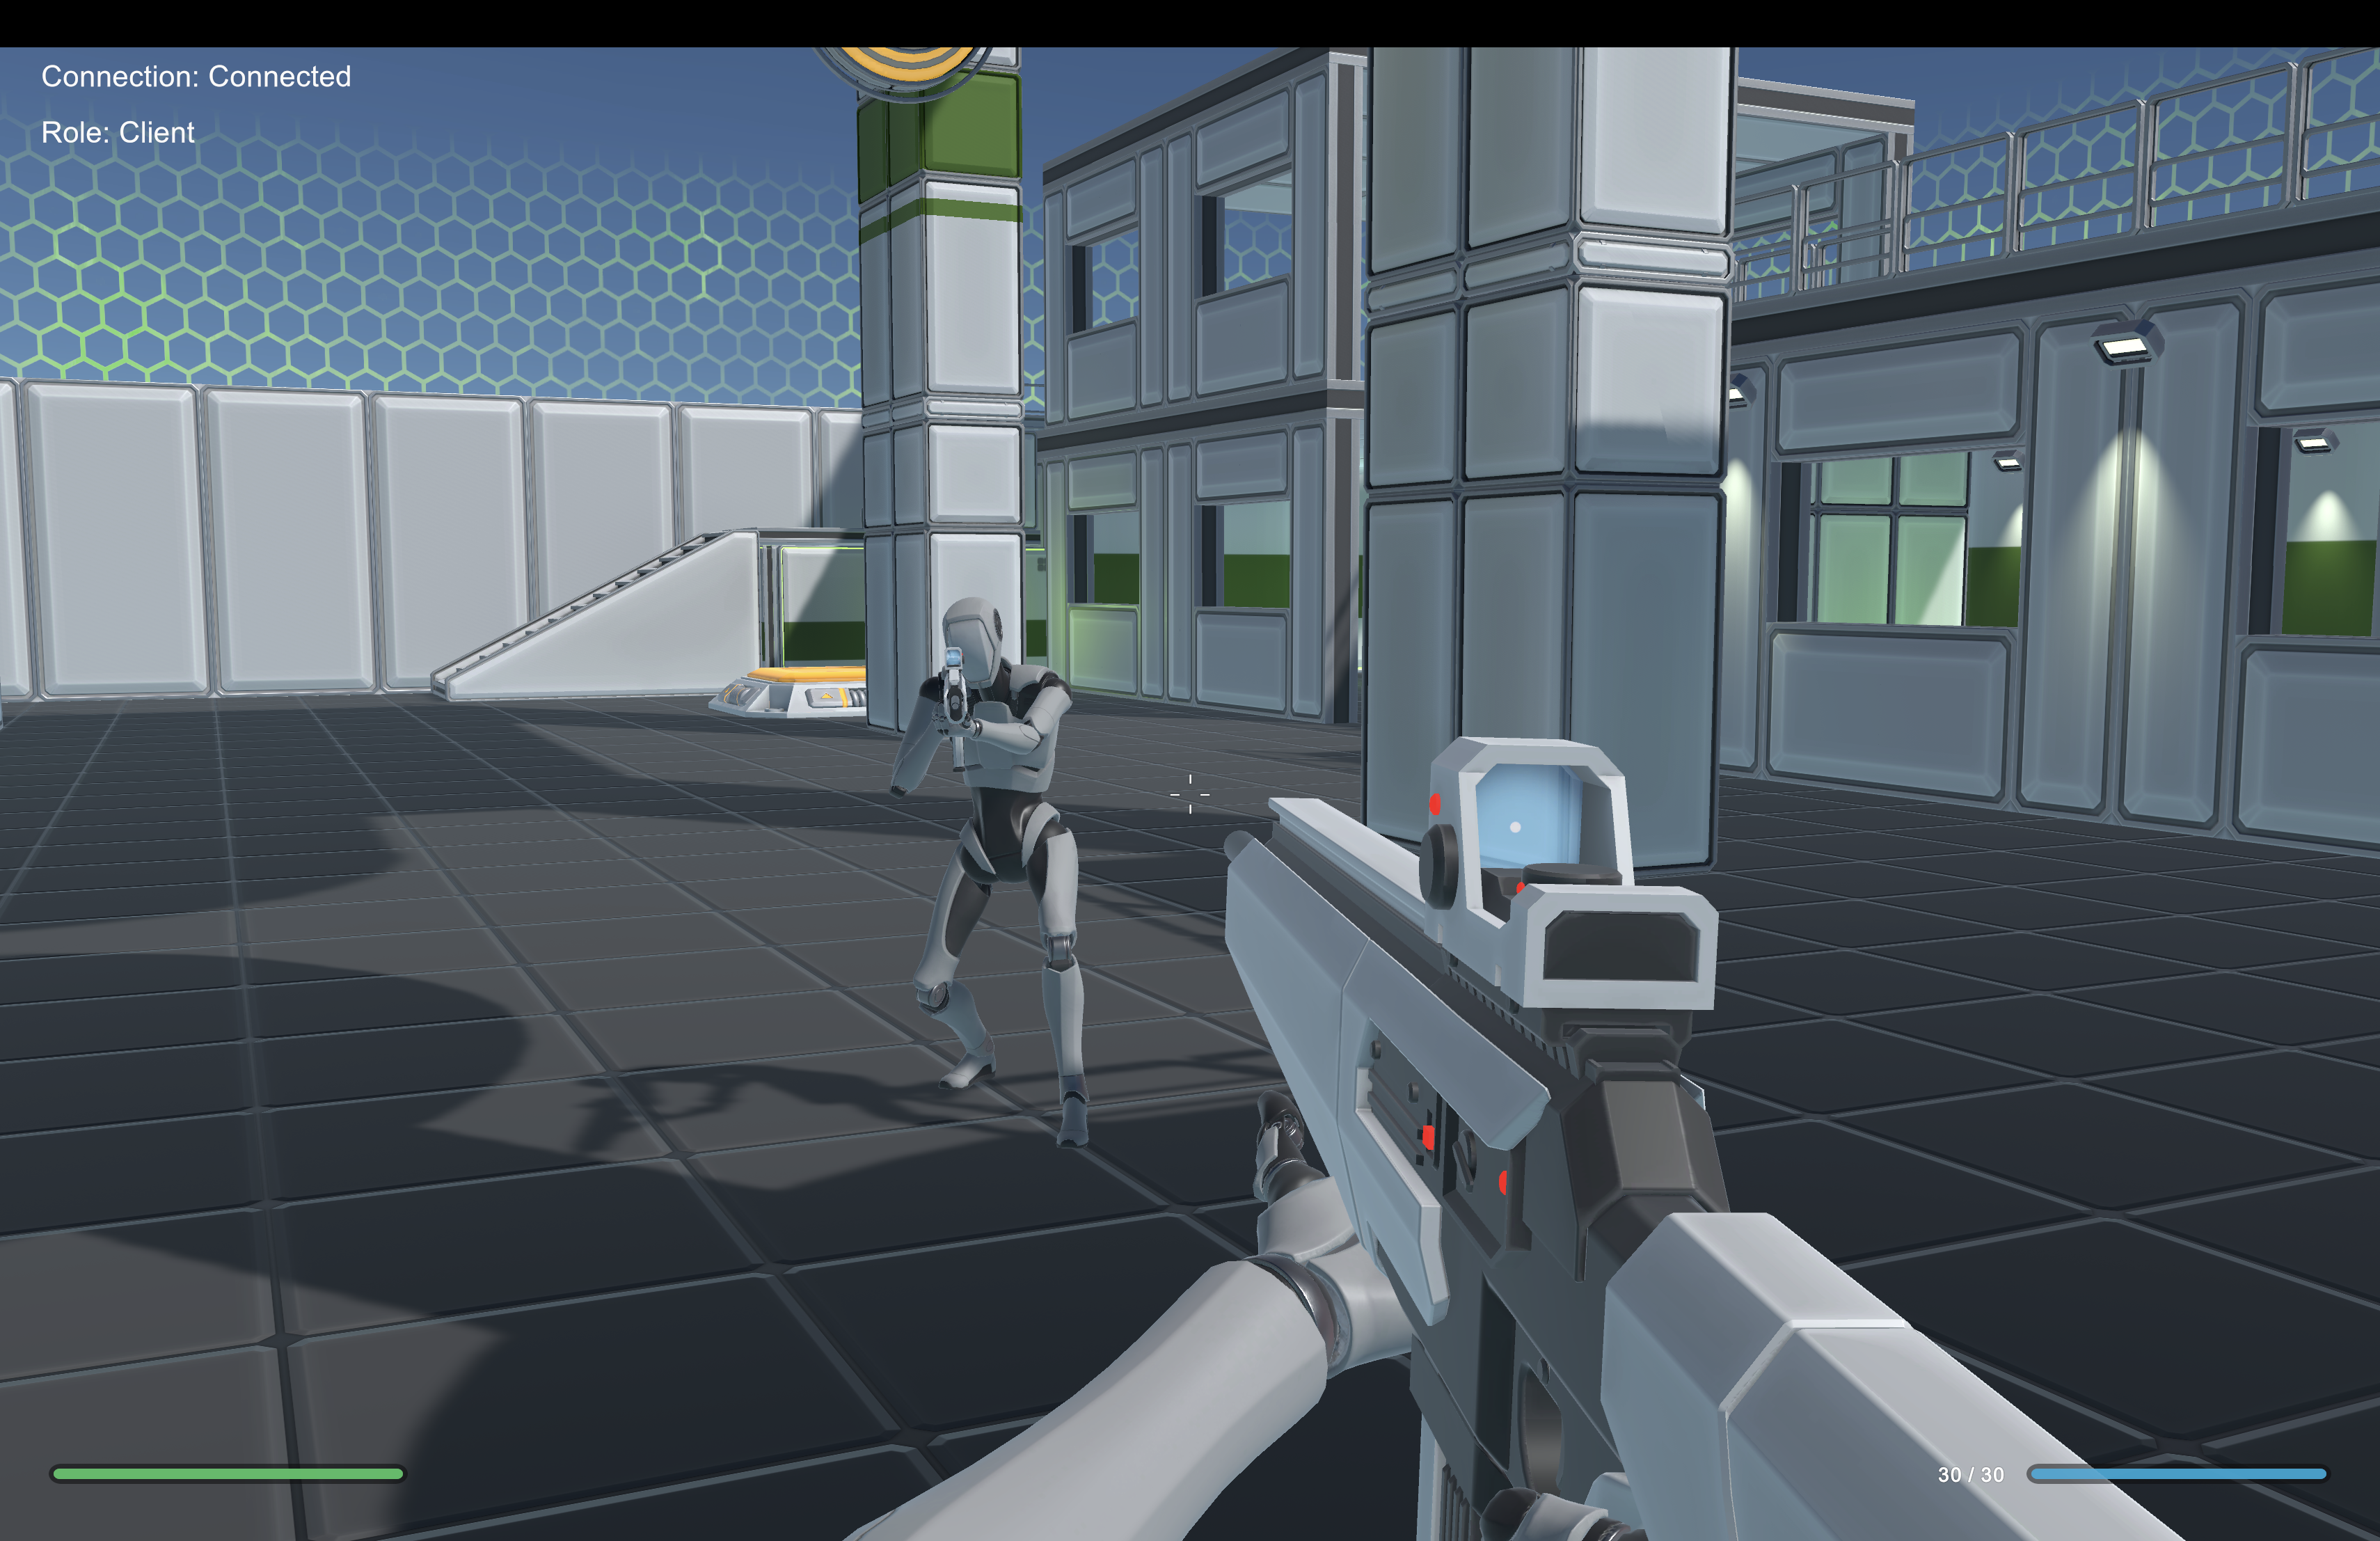
Running locally with no GameFlow runtime present, the SDK logs connected (local mode) and server ready. The same build connects to the GameFlow runtime automatically (sidecar mode) when deployed.